When the weather outside is frightful, as the holiday song goes, but you have to be — or want to be — outside, there’s little better than a great pair of winter boots that keep your feet warm and dry. Winter boots are tough and rugged but need proper care to be able to perform throughout the worst of elements. Here’s our handy guide to keep your boots at their best all season long.
SEAL ‘EM UP. THEN KEEP ‘EM CLEAN
If your boots are brand new — or if you haven’t done this part yet on a pair you already own — you’ll want to waterproof them.
For leather boots: For the best care, do a two-part process. Start with a leather conditioner. Rub a generous dollop into the leather with a cotton cloth, and let that dry. If the leather drinks up the product quickly, that means it’s dry and needs more product. Repeat the process till the leather feels and looks moisturized. Let your boots dry overnight (don’t put them on or near a radiator or fire — as tempting as that may be, a direct heat source can damage the leather). Grab another cloth, and buff your boots gently, just enough so that there’s no visible product. Then, follow the directions on your waterproofing spray. Do at least two-three coats, and let the boots dry between coats.
Bring suede back to life by holding your boots over some steam, and then brushing the suede in the same direction with a soft nylon brush. For spot cleaning suede, use a pencil eraser, or a dry eraser.
 For boots that have all or some man-made materials: Boots made out of manmade materials are simpler to maintain. Simply wipe them off with a damp cloth, or remove debris with a soft nylon brush. If your boots are a combination of leather and manmade materials, then cover up the manmade materials while you’re doing the leather conditioning and waterproofing. You’ll want to use a different product for waterproofing on the non-leather parts, and just as you did previously, cover up the parts of your boots that you’re not currently waterproofing.
 Wool felt is great at resisting dirt and debris, but if you do need to spot clean, do so gently with a brush made of natural fibers. You can also do spot cleaning with water, but do not submerge the entire boot into a sinkful of water or under a running tap.
 These types of boots are usually handmade and should be spot-washed by hand only.
DON’T FORGET THE SOLES
Many winter boots will have thicker soles that help provide traction on ice and snow. Pay attention to your boots’ soles so that you can stay safe on slippery surfaces. Wipe off any visible mud or debris with a damp cloth once you get home; let the boots dry naturally.

Since those soles will most likely be composed of a manmade material, keep your boots away from direct heat sources as you don’t want the soles to warp or crack. Check the soles regularly and remove any small stones from the treads. If you live in an area that sands instead of ices, you can wait till your boots dry and then give them a good shake or clap them together to loosen all the dirt. Or, get rid of the sand when it’s still wet with a damp cloth.
WHERE TO KEEP ‘EM
What to do with winter boots when you’ve just come home? You’ll want to take them off as soon as possible, and having a proper staging area where you can leave them to dry without tracking in any salt or dirt is important.
If your apartment is tiny or you have an entrance that’s right by the front door, you can still create an area for boots: Use a thick, absorbent mat where you can set your boots. You can also repurpose a baking tray with raised sides to keep moisture from seeping out onto your floors or carpet.
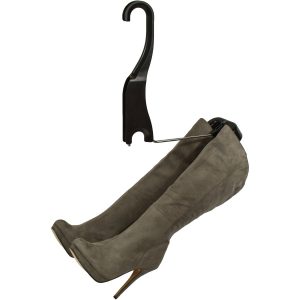
If you have an entrance closet, we must, of course, recommend our very own Boot Butler. It’ll get your boots off the floor, and that’s always a really good thing. Pop the boots onto the Butler, where they can hang happily, well-ventilated and waiting for the next time you wear them.
 ONCE YOU’RE DONE and spring arrives, do some due diligence on getting your boots into tip-top shape before you put them away for the spring and summer. Clean them up. If they need maintenance that requires a cobbler, do that before you put them away. It’ll be so nice to pull out clean and ready-to-wear boots the next cold season!
EXPERT TIP: To give your leather boots some extra love, wrap them in natural materials, like an old cotton t-shirt or a linen bag. That extra layer of protection will help keep the leather conditioned as the boots hibernate until the next time they’re needed.